Photos
The photos can be in a *.jpeg, *.jpg, * .png, *.bmp or *.gif format. The expected size is about 35 mm by 45 mm (identity photo), if the photos are larger, an option allows you to automatically reduce the size during the import.
Integrate photos in the base
Import and automatically allocate the photos
Prerequisite All the photos are found in the same folder and named systematically (national number, surname_first name, etc.).
- Go to the menu Imports/Exports > PHOTOS > Import the teachers'/students'/staff's photos.
- In the import window, click on the button
 to indicate the folder where the photos are found.
 - Indicate how the photos were named so that EDT can allocate the photos to the correct resources.
Manually allocate a photo
- Go to the wanted tab:
- Timetable > Teachers >
 Form,
Form, - Timetable > Students/Staff >
 Information form.
- Timetable > Teachers >
- Select the person in the list on the left.
- On the right, double-click on the photo’s place.
- In the popup window, click on the button Import a photo.
- In the popup window, double-click on the photo.
Take photos with a web-cam
Prerequisite Your workstation is equipped with a web-cam.
- Go to the wanted tab:
- Timetable > Teachers > Form,
- Timetable > Students/Staff > Information form.
- Timetable > Teachers >
- Select the person in the list on the left.
- On the right, double-click on the photo’s place.
- In the popup window, click on the button Activate the Webcam.
- In the popup window, verify that EDT has detected the web-cam and adjust the Video parameters.
- You will visualize the camera’s viewing angle and frame for the photo. Click on the camera button on the bottom of the frame: the photo that is taken is displayed on the right.
Recover the photos from last years
Authorizations
Authorize the homeroom teacher to modify his/her students’ photos
- Go to the tab Timetable > Teachers >
 Authorization profiles.
 - Select the concerned profile.
- In the category Roster, tick of his/her classes and students, then modify the photos.
Management of image rights
The photos of teachers/staff/students are used in EDT to construct the rosters. If you have PRONOTE, they may prohibit the use of their photo from their Webspaces by un-ticking the option I authorize the use of my photo in PRONOTE.
- To assure that they have accepted the exploitation of their photo, go to the wanted tab:
- Timetable > Teachers > Form,
- Timetable > Students/Staff > Information form.
- Timetable > Teachers >
- Select the person in the list on the left.
- Click on the button
 in the rubric Identity to edit the form.
 - Under the photo, the box Use authorized must be ticked.
Other operations
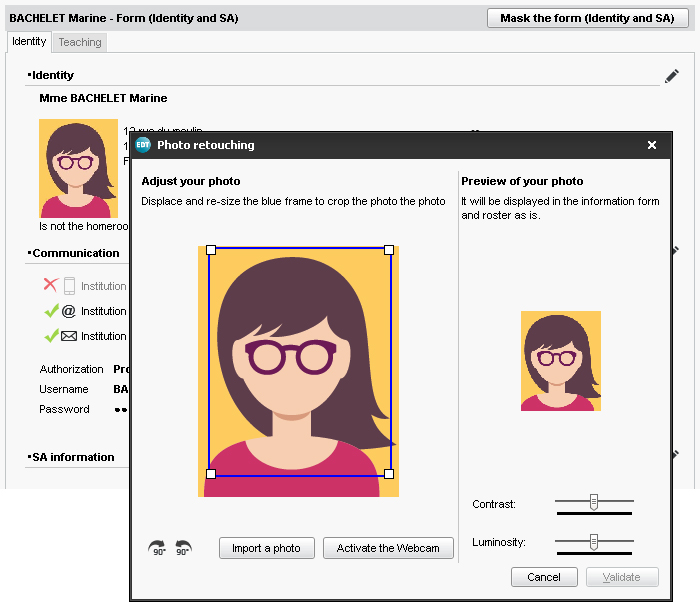
Retouch a photo
- Go to the wanted tab:
- Timetable > Teachers > Form,
- Timetable > Students/Staff > Information form.
- Timetable > Teachers >
- Select the person in the list on the left.
- On the right, double-click on the photo’s place.
- In the edition window of the photo, you can pivot, crop and modify the contrast and luminosity of the photo.
Delete a photo
- Go to the tab Timetable > Teachers/Students/Staff >
 List.
List. - Select the person or those concerned, right-click and choose Modify > Photos > Delete.
Export the photos
Go to the menu Imports/Exports > PHOTOS > Export the teachers'/students/staff's photos.
Find the folder where the photos are stocked
The photos are stocked in C:\ProgramData\IndexEducation\EDT\MONOPOSTE-or-SERVEUR\VERSION 2020-0\FR\PHOTO (provided that the application was installed and stored in the by default placement).
Also see